|
|
Tips, Tricks & Techniques
Click the topics at right to go directly to what you need to know: |
|
What To Do When Clay & Glazes Freeze
First, Don't Panic!
The freeze-&-thaw cycle is part of the geological processes that helped create the raw materials that are in your clays and glazes. The materials have been through this a million times before. Let them thaw, and then...
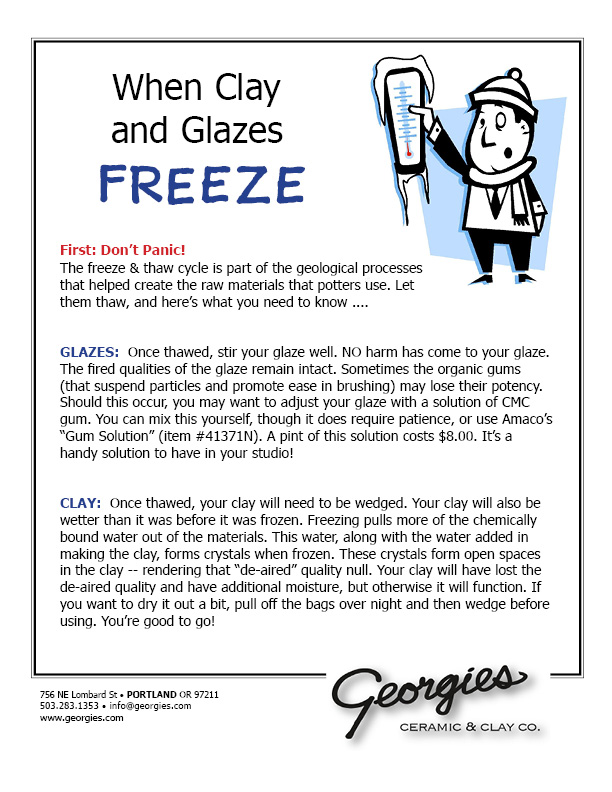 |
Click the Image at left -
to download this tip sheet. It gives you the information you'll need for reconstituting your products.
... and keep scrolling for more problem solutions below!
|
Step-by-Step to correct the problem ...
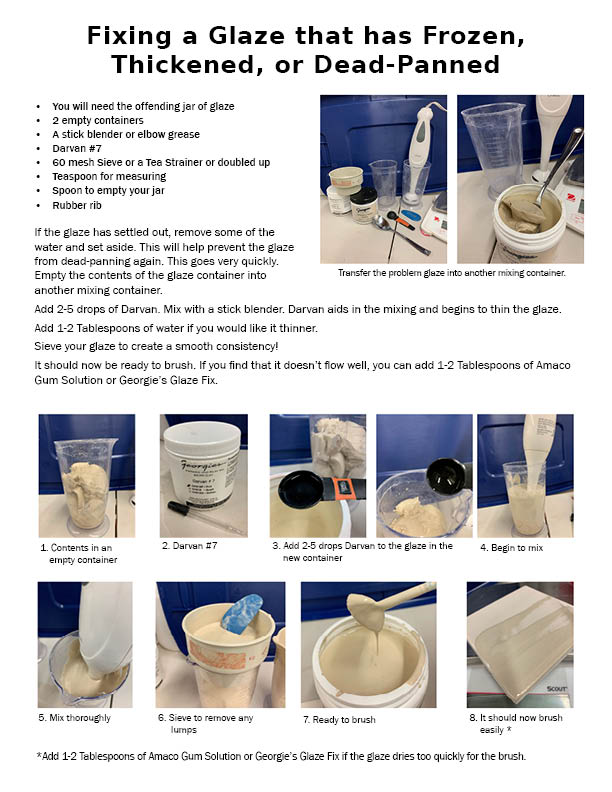 |
Click the Image at left -
to download this tip sheet.This will show you step-by-step how to bring back a thick or dead-panned glaze.
... and keep scrolling for more problem solutions below!
|
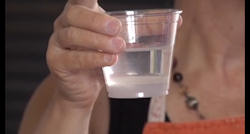
How to Fix Your Glazes- by Linda Arbuckle
 |
What do you do with
a busted glaze? |
When glazes freeze, or when they dry out, or a dozen other things happen, they can lose the organic gums that keep your ingredients suspended for smooth application. Learn how Epsom salts can flocculate your glaze again and keep those solid ingredients from constantly settling down to the bottom of the jar. |
 |
 |
For the full video clip of Linda's demonstration, and for more information about subscribing to Ceramic Arts Daily, click either image above to see the video. We highly recommend Ceramic Arts Daily as a resource for tips and techniques on many ceramic subjects. |
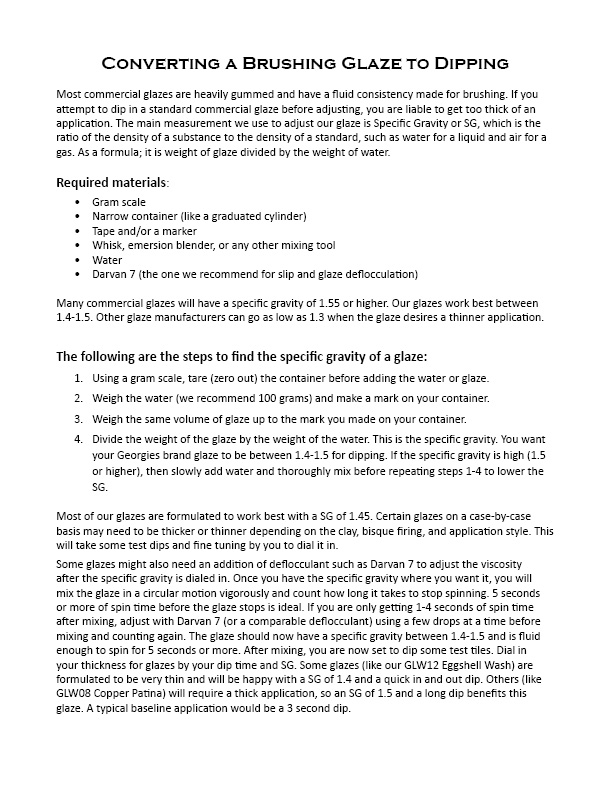
Converting Brushing Glazes into Dipping
Most commercial glazes are heavily gummed and have a fluid consistency made for brushing. If you attempt to dip in a standard commercial glaze before adjusting, you are liable to get too thick of an application. The main measurement we use to adjust our glaze is Specific Gravity or SG, which is the ratio of the density of a substance to the density of a standard, such as water for a liquid and air for a gas. As a formula; it is weight of glaze divided by the weight of water.
Click on the image below for a PDF that gives you step-by-step instructions.
Mixing Dry Glazes from Pre-Blended Materials
Mixing Dry glazes needs to be done in a well ventilated area. Personal Protection Equipment (PPE), must be worn when mixing. This means: an OSHA approved and properly fitted respirator, an apron, protective eye wear, and gloves. Glazes and the materials associated in their formulation are silica based, some contain colorants that may be of concern.
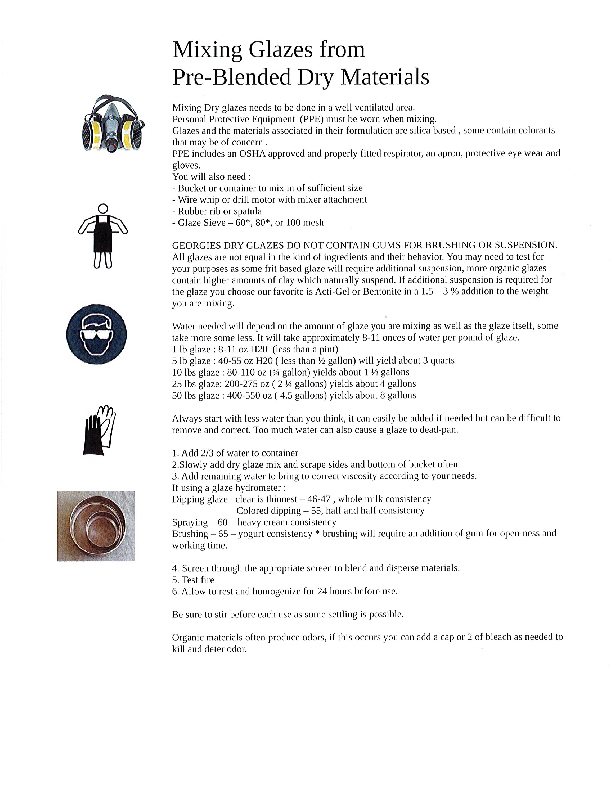 |
Click the Image at left -
to download the information sheet on the proper and safe way to mix dry glaze materials.
|
Saving Old, Dried Out Glazes
We've all had that sinking feeling when we grab a jar of glaze off the shelf only to realize it's dried out. What can you do? There are three options: rehydrate, repurpose, or dispose.
Click HERE to go to the Amaco blog post to find out what works best for your situation. Also, take a look at the video on using Gum Solution by Kathy Skaggs.
Using Low-Fire Clear Glazes Effectively
YOU WOULD THINK using a clear glaze would be a "no brainer", but it's not!
In reality, it is an area in ceramics that generates the most questions and
problems for individuals and teachers alike.
Low-fire clay work has a unique criteria to make the glaze work and fit properly. The clay itself, once bisque-fired, becomes a substrate layer for the glaze. The glaze acts like a sheet of glass permanently affixed to the clay. Correct glaze fit begins with the bisque firing.
Your bisque fire must be both slow and accurate. Slow to allow the clay
to outgas, ridding itself of carbon, water, sulfur, and (depending on your clay) other
organic carry-alongs. If this is not done properly, these inclusions haunt you as they
become permanent potential flaws in your work.
The correct temperature for low-fire bisque is cone 04. Using that correct
bisque temperature is also necessary! In low-fire ceramics, the bisque "heat-work" is
hotter than the glaze firing. This sets up your piece for the correct fit of the glaze to
the clay. Underfiring will not allow the clay body to fully shrink, so it stays larger than
it should. It will produce a crazed glaze surface, which can't be fixed.
Glaze firing is best done at cone 05! No-lead glazes benefit from a bit of additional heat. Directions on the manufacturers' labels say "Fire to a shelf cone 06." Most of you
do not use witness cones on every shelf every time, so you can't be sure that your pieces have actually and accurately hit that cone 06 temperature. To make sure your firing gets there, adjust your firing to cone 05 at medium speed with no hold time. You will see a
brilliant, clear shine sparkling back at you when you open your kiln!
Last but not least, there is the question of application. Clear glazes like and require a lighter approach. They like thin applications. How you achieve that will depend
on your glazing style. As a heavy glazer, I like two thin brushed coats. Often I need to
thin the glaze to skim milk consistency to do this. However, if you brush and stretch
out each stroke, you should keep the glaze as is.
By applying two thin coats cross-hatched to each other, with the first coat
applied all in one direction and the second coat at 90° (perpendicular) to the first, you
achieve a more even, overall application.
If you have a detailed underglaze application, which may include the ever-tricky "running black," it's best to sponge on the first glaze coat. No smears, no runs, no pulls or dragging!
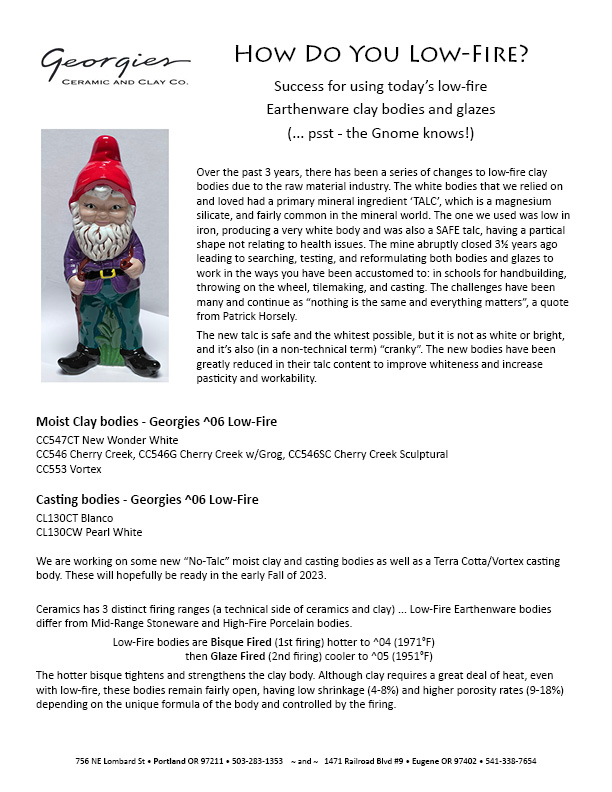 |
"How Do You Lowfire?"
Changes have happened over the last 3 years with the white low-fire clay and casting bodies. It's been a process to create a new product the works well for everyone. Click on the image at left for a 4 page flyer that talks about our red and "new-talc" clay along with our casting bodies, and how they interact with different underglazes and glaze applications. |
Clear Glazing at Cone 6
Using clear glazes at cone 6 starts with your choices of which project, which
clear glaze, and which clay you'll use for the project. They all have to work together to
get the results you want for your work. Several things factor into working with cone 6
clays and glazes. The clay takes on a much greater role in your finished piece as the
glaze color, the clay color, the clay surface, and the fit of the glaze to the clay body
all play roles in the final outcome.
Successful cone 6 glaze work starts with correctly fired bisque.
Your target temperature for mid-range work is bisque firing to cone 04. With a
cone 6 clay, this temperature leaves the clay not fully matured, creating a porousness
that allows the glaze to penetrate and interface with the clay body.
Clear (transparent) glazes at cone 6 are often formulated either WITH or WITHOUT zinc.
Zinc helps the glaze fit, but can compromise and change underglaze colors. Consider this example plate made with Georgies' PG629 Super-Clear and PG630 Zinc-Free Clear.
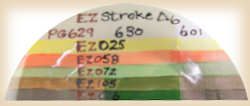 |
Look closely at the orange line for EZ058 Poppy Orange, and the bottom two lines for EZ105 Neon Green and EZ016 Grass Green. See how EZ058 is brighter, but EZ105 and EZ016 turn brown when zinc is present in the glaze? |
This demonstrates
why we often say
that when it comes
to ceramics ...
"Everything matters,
and nothing is the same." |
 |
Last but not least, there is the question of application. Clear glazes like and require a lighter approach: they like thin applications. How you achieve that will depend on your glazing style. If you glaze heavily, with a loaded brush that lays down a flowing coat, you may want to thin the glaze to skim milk consistency. If you brush and stretch out each stroke, however, you should not thin the glaze. By applying two thin coats cross-hatched to each other, with the brushstrokes of the second coat turned 90° across the brushstrokes of the first coat, you achieve a more even overall application.
And if you work with detailed underglaze designs, it's best to sponge on that first glaze
coat. No smears, no runs, no pulls and no dragging of the colors!
How to Use Nylon Banding Straps
Nylon banding straps are far superior to rubber bands for handling and working with
molds. The fundamental problem with rubber bands is that they weaken and stretch
over time. That can lead to huge, ugly messes when casting, if the weight of the
slip stretches the rubber bands enough that the mold can leak.
It's even worse when the rubber bands weaken when the mold is in storage! There may
be no more awful, helpless feeling for a ceramist than watching mold parts shatter on
the floor because the rubber bands broke when picking up the mold.
Banding straps can prevent both those problems. We've seen that figuring out how
to use the straps can be challenging, so we've prepared this tip sheet.
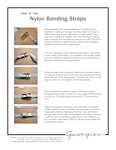 |
Click image at left ...
to download the tip sheet.
(Banding straps can come in handy for other applications, like woodworking, where you need firm, steady pressure to hold parts together.) |
Tips for Buying a Used Wheel
When purchasing a used electric wheel, here are some basic tips on what to look for.
- Start with the power cord.
- Is the plug in good shape? No bent prongs or burn marks?
- Is it a 3-prong plug? That will mean the wheel will be grounded when it's plugged into a grounded receptacle.
- Is the cord itself in good shape? Are there any nicks or cuts in the cord?
- Exposed wires may short out or shock you when touched.
- What does the wheel sound like when turned on and running?
- A hum is ok, but you don't want to hear grinding or loud squeaking.
- Those may mean the wheel head bearings are shot or the drive belt(s) need adjustment or replacement.
- Does the wheel head itself spin true and flat?
- Does the whole wheel head wobble?
- Does the wheel head spin like a warped record with one part up or down?
- Is the wheel head connected securely to the shaft?
- What's the condition of the screws or bolts (if any) connecting the wheel head to the shaft?
- Can you stop the wheel head easily just by grabbing it when the wheel head is turning slowly?
We hope this info helps you make a good buying decision!
|